Arsip
Cara Melimit download berdasarkan Jenis file di Mikrotik Router + Queue Tree + Mangle nya
Mikrotik Router memiliki fitur lengkap untuk Bandwidth Management. Berikut catatan bagaimana cara melimit download berdasarkan jenis-jenis file nya saja seperti .exe .rar .flv .zip .wmv dan lain lain, beserta queue tree nya supaya adil,dan browsing,poker dan pointblank tetap lancar termasuk download .doc .pdf .docx, dan semua jenis gambar.
1. Remote Mikrotik anda menggunakan winbox,kemudian di halaman utama winbox pilih “Ip” kemudian “Firewall” kemudian “Layer7 Protocol” selanjut klik tanda + warna merah
2. Selanjutnya isikan,
Name:YOUTUBE
Regexp: http/(0\.9|1\.0|1\.1)[\x09-\x0d ][1-5][0-9][0-9][\x09-\x0d -~]*(content-type: video)
3. Setelah itu klik Ok,selanjutnya di halaman utama winbox pilih “New terminal” kemudian Copy perintah di bawah ini dan pastekan di “New Terminal” winbox:
/ip firewall layer7-protocol add name=”EXE” regexp=”\\.(exe)”
/ip firewall layer7-protocol add name=”RAR” regexp=”\\.(rar)”
/ip firewall layer7-protocol add name=”ZIP” regexp=”\\.(zip)”
/ip firewall layer7-protocol add name=”7z” regexp=”\\.(7z)”
/ip firewall layer7-protocol add name=”CAB” regexp=”\\.(cab)”
/ip firewall layer7-protocol add name=”ASF” regexp=”\\.(asf)”
/ip firewall layer7-protocol add name=”MOV” regexp=”\\.(mov)”
/ip firewall layer7-protocol add name=”WMV” regexp=”\\.(wmv)”
/ip firewall layer7-protocol add name=”MPG” regexp=”\\.(mpg)”
/ip firewall layer7-protocol add name=”MPEG” regexp=”\\.(mpeg)”
/ip firewall layer7-protocol add name=”MKV” regexp=”\\.(mkv)”
/ip firewall layer7-protocol add name=”AVI” regexp=”\\.(avi)”
/ip firewall layer7-protocol add name=”FLV” regexp=”\\.(flv)”
/ip firewall layer7-protocol add name=”WAV” regexp=”\\.(wav)”
/ip firewall layer7-protocol add name=”RM” regexp=”\\.(rm)”
/ip firewall layer7-protocol add name=”MP3″ regexp=”\\.(mp3)”
/ip firewall layer7-protocol add name=”MP4″ regexp=”\\.(mp4)”
/ip firewall layer7-protocol add name=”RAM” regexp=”\\.(ram)”
/ip firewall layer7-protocol add name=”RMVB” regexp=”\\.(rmvb)”
/ip firewall layer7-protocol add name=”DAT” regexp=”\\.(dat)”
/ip firewall layer7-protocol add name=”DAA” regexp=”\\.(daa)”
/ip firewall layer7-protocol add name=”ISO” regexp=”\\.(iso)”
/ip firewall layer7-protocol add name=”NRG” regexp=”\\.(nrg)”
/ip firewall layer7-protocol add name=”BIN” regexp=”\\.(bin)”
/ip firewall layer7-protocol add name=”VCD” regexp=\\.(vcd)
4. Kemudian kita buat manglenya…Copykan Mangle di bawah dan pastekan di “New Terminal” winbox:
/ip firewall mangle add action=mark-packet \
chain=prerouting comment=”YOUTUBE MARK PACKET ” disabled=no \
layer7-protocol=YOUTUBE new-packet-mark=YOUTUBE passthrough=no
/ip firewall mangle add action=mark-packet \
chain=prerouting comment=”EXE MARK PACKET ” disabled=no \
layer7-protocol=EXE new-packet-mark=EXE passthrough=no
/ip firewall mangle add action=mark-packet \
chain=prerouting comment=”RAR MARK PACKET ” disabled=no \
layer7-protocol=RAR new-packet-mark=RAR passthrough=no
/ip firewall mangle add action=mark-packet \
chain=prerouting comment=”ZIP MARK PACKET ” disabled=no \
layer7-protocol=ZIP new-packet-mark=ZIP passthrough=no
/ip firewall mangle add action=mark-packet \
chain=prerouting comment=”7z MARK PACKET ” disabled=no \
layer7-protocol=7z new-packet-mark=7z passthrough=no
/ip firewall mangle add action=mark-packet \
chain=prerouting comment=”CAB MARK PACKET ” disabled=no \
layer7-protocol=CAB new-packet-mark=CAB passthrough=no
/ip firewall mangle add action=mark-packet \
chain=prerouting comment=”ASF MARK PACKET ” disabled=no \
layer7-protocol=ASF new-packet-mark=ASF passthrough=no
/ip firewall mangle add action=mark-packet \
chain=prerouting comment=”MOV MARK PACKET ” disabled=no \
layer7-protocol=MOV new-packet-mark=MOV passthrough=no
/ip firewall mangle add action=mark-packet \
chain=prerouting comment=”WMV MARK PACKET ” disabled=no \
layer7-protocol=WMV new-packet-mark=WMV passthrough=no
/ip firewall mangle add action=mark-packet \
chain=prerouting comment=”MPG MARK PACKET ” disabled=no \
layer7-protocol=MPG new-packet-mark=MPG passthrough=no
/ip firewall mangle add action=mark-packet \
chain=prerouting comment=”MPEG MARK PACKET ” disabled=no \
layer7-protocol=MPEG new-packet-mark=MPEG passthrough=no
/ip firewall mangle add action=mark-packet \
chain=prerouting comment=”MKV MARK PACKET ” disabled=no \
layer7-protocol=MKV new-packet-mark=MKV passthrough=no
/ip firewall mangle add action=mark-packet \
chain=prerouting comment=”AVI MARK PACKET ” disabled=no \
layer7-protocol=AVI new-packet-mark=AVI passthrough=no
/ip firewall mangle add action=mark-packet \
chain=prerouting comment=”FLV MARK PACKET ” disabled=no \
layer7-protocol=FLV new-packet-mark=FLV passthrough=no
/ip firewall mangle add action=mark-packet \
chain=prerouting comment=”WAV MARK PACKET ” disabled=no \
layer7-protocol=WAV new-packet-mark=WAV passthrough=no
/ip firewall mangle add action=mark-packet \
chain=prerouting comment=”RM MARK PACKET ” disabled=no \
layer7-protocol=RM new-packet-mark=RM passthrough=no
/ip firewall mangle add action=mark-packet \
chain=prerouting comment=”MP3 MARK PACKET ” disabled=no \
layer7-protocol=MP3 new-packet-mark=MP3 passthrough=no
/ip firewall mangle add action=mark-packet \
chain=prerouting comment=”MP4 MARK PACKET ” disabled=no \
layer7-protocol=MP4 new-packet-mark=MP4 passthrough=no
/ip firewall mangle add action=mark-packet \
chain=prerouting comment=”RAM MARK PACKET ” disabled=no \
layer7-protocol=RAM new-packet-mark=RAM passthrough=no
/ip firewall mangle add action=mark-packet \
chain=prerouting comment=”RMVB MARK PACKET ” disabled=no \
layer7-protocol=RMVB new-packet-mark=RMVB passthrough=no
/ip firewall mangle add action=mark-packet \
chain=prerouting comment=”DAT MARK PACKET ” disabled=no \
layer7-protocol=DAT new-packet-mark=DAT passthrough=no
/ip firewall mangle add action=mark-packet \
chain=prerouting comment=”DAA MARK PACKET ” disabled=no \
layer7-protocol=DAA new-packet-mark=DAA passthrough=no
/ip firewall mangle add action=mark-packet \
chain=prerouting comment=”ISO MARK PACKET ” disabled=no \
layer7-protocol=ISO new-packet-mark=ISO passthrough=no
/ip firewall mangle add action=mark-packet \
chain=prerouting comment=”NRG MARK PACKET ” disabled=no \
layer7-protocol=NRG new-packet-mark=NRG passthrough=no
/ip firewall mangle add action=mark-packet \
chain=prerouting comment=”BIN MARK PACKET ” disabled=no \
layer7-protocol=BIN new-packet-mark=BIN passthrough=no
/ip firewall mangle add action=mark-packet \
chain=prerouting comment=”VCD MARK PACKET ” disabled=no \
layer7-protocol=VCD new-packet-mark=VCD passthrough=no
5. Selanjutnya di limit dengan queue tree,di sini saya buat 256kb bandwidth untuk download .wmv rar. .zip .exe .flv dll ….dan jika client download bersamaan file file tersebut,maka bagi rata dengan 256kbps bandwidth,silahkan anda ubah kecepatan limitnya sesuai dengan selera anda masing – masing.
Copykan queue tree di bawah ini dan pastekan di “New Terminal” Winbox:
/queue tree add name=”LIMIT FILE EXTENTION” parent=global-out \
limit-at=0 priority=3 max-limit=256000 burst-limit=\
0 burst-threshold=0 burst-time=0s
/queue tree add name=”YOUTUBE” parent=”LIMIT FILE EXTENTION” \
packet-mark=YOUTUBE limit-at=0 queue=default priority=1 max-limit=\
0 burst-limit=0 burst-threshold=0 burst-time=0s
/queue tree add name=”7z” parent=”LIMIT FILE EXTENTION” \
packet-mark=7z limit-at=0 queue=default priority=1 max-limit=\
0 burst-limit=0 burst-threshold=0 burst-time=0s
/queue tree add name=”ASF” parent=”LIMIT FILE EXTENTION” \
packet-mark=ASF limit-at=0 queue=default priority=1 max-limit=\
0 burst-limit=0 burst-threshold=0 burst-time=0s
/queue tree add name=”AVI” parent=”LIMIT FILE EXTENTION” \
packet-mark=AVI limit-at=0 queue=default priority=1 max-limit=\
0 burst-limit=0 burst-threshold=0 burst-time=0s
/queue tree add name=”BIN” parent=”LIMIT FILE EXTENTION” \
packet-mark=BIN limit-at=0 queue=default priority=1 max-limit=\
0 burst-limit=0 burst-threshold=0 burst-time=0s
/queue tree add name=”CAB” parent=”LIMIT FILE EXTENTION” \
packet-mark=CAB limit-at=0 queue=default priority=1 max-limit=\
0 burst-limit=0 burst-threshold=0 burst-time=0s
/queue tree add name=”DAA” parent=”LIMIT FILE EXTENTION” \
packet-mark=DAA limit-at=0 queue=default priority=1 max-limit=\
0 burst-limit=0 burst-threshold=0 burst-time=0s
/queue tree add name=”DAT” parent=”LIMIT FILE EXTENTION” \
packet-mark=DAT limit-at=0 queue=default priority=1 max-limit=\
0 burst-limit=0 burst-threshold=0 burst-time=0s
/queue tree add name=”EXE” parent=”LIMIT FILE EXTENTION” \
packet-mark=EXE limit-at=0 queue=default priority=1 max-limit=\
0 burst-limit=0 burst-threshold=0 burst-time=0s
/queue tree add name=”FLV” parent=”LIMIT FILE EXTENTION” \
packet-mark=FLV limit-at=0 queue=default priority=1 max-limit=\
0 burst-limit=0 burst-threshold=0 burst-time=0s
/queue tree add name=”ISO” parent=”LIMIT FILE EXTENTION” \
packet-mark=ISO limit-at=0 queue=default priority=1 max-limit=\
0 burst-limit=0 burst-threshold=0 burst-time=0s
/queue tree add name=”MKV” parent=”LIMIT FILE EXTENTION” \
packet-mark=MKV limit-at=0 queue=default priority=1 max-limit=\
0 burst-limit=0 burst-threshold=0 burst-time=0s
/queue tree add name=”MOV” parent=”LIMIT FILE EXTENTION” \
packet-mark=MOV limit-at=0 queue=default priority=1 max-limit=\
0 burst-limit=0 burst-threshold=0 burst-time=0s
/queue tree add name=”MP3″ parent=”LIMIT FILE EXTENTION” \
packet-mark=MP3 limit-at=0 queue=default priority=1 max-limit=\
0 burst-limit=0 burst-threshold=0 burst-time=0s
/queue tree add name=”MP4″ parent=”LIMIT FILE EXTENTION” \
packet-mark=MP4 limit-at=0 queue=default priority=1 max-limit=\
0 burst-limit=0 burst-threshold=0 burst-time=0s
/queue tree add name=”MPEG” parent=”LIMIT FILE EXTENTION” \
packet-mark=MPEG limit-at=0 queue=default priority=1 max-limit=\
0 burst-limit=0 burst-threshold=0 burst-time=0s
/queue tree add name=”MPG” parent=”LIMIT FILE EXTENTION” \
packet-mark=MPG limit-at=0 queue=default priority=1 max-limit=\
0 burst-limit=0 burst-threshold=0 burst-time=0s
/queue tree add name=”NRG” parent=”LIMIT FILE EXTENTION” \
packet-mark=NRG limit-at=0 queue=default priority=1 max-limit=\
0 burst-limit=0 burst-threshold=0 burst-time=0s
/queue tree add name=”RAM” parent=”LIMIT FILE EXTENTION” \
packet-mark=RAM limit-at=0 queue=default priority=1 max-limit=\
0 burst-limit=0 burst-threshold=0 burst-time=0s
/queue tree add name=”RAR” parent=”LIMIT FILE EXTENTION” \
packet-mark=RAR limit-at=0 queue=default priority=1 max-limit=\
0 burst-limit=0 burst-threshold=0 burst-time=0s
/queue tree add name=”RM” parent=”LIMIT FILE EXTENTION” \
packet-mark=RM limit-at=0 queue=default priority=1 max-limit=\
0 burst-limit=0 burst-threshold=0 burst-time=0s
/queue tree add name=”RMVB” parent=”LIMIT FILE EXTENTION” \
packet-mark=RMVB limit-at=0 queue=default priority=1 max-limit=\
0 burst-limit=0 burst-threshold=0 burst-time=0s
/queue tree add name=”VCD” parent=”LIMIT FILE EXTENTION” \
packet-mark=VCD limit-at=0 queue=default priority=1 max-limit=\
0 burst-limit=0 burst-threshold=0 burst-time=0s
/queue tree add name=”WAV” parent=”LIMIT FILE EXTENTION” \
packet-mark=WAV limit-at=0 queue=default priority=1 max-limit=\
0 burst-limit=0 burst-threshold=0 burst-time=0s
/queue tree add name=”WMV” parent=”LIMIT FILE EXTENTION” \
packet-mark=WMV limit-at=0 queue=default priority=1 max-limit=\
0 burst-limit=0 burst-threshold=0 burst-time=0s
/queue tree add name=”ZIP” parent=”LIMIT FILE EXTENTION” \
packet-mark=ZIP limit-at=0 queue=default priority=1 max-limit=\
0 burst-limit=0 burst-threshold=0 burst-time=0s
Sumber : http://www.wirelessrouterproxy.com
Proteksi Keamanan Wireless
Untuk keamanan Routerboard Mikrotik dari hack atau cut IP, maka copykan seluruk perintah di bawah ini,kemudian pastekan di new terminal :
–Untuk Keamanan Filter Port Forces:
/ip firewall filter add chain=input protocol=tcp dst-port=22 src-address-list=ssh_blacklist action=drop comment=”Drop_SSH_brute_forces” disabled=no
/ip firewall filter add chain=input protocol=tcp dst-port=22 connection-state=new src-address-list=ssh_stage3 action=add-src-to-address-list address-list=ssh_blacklist \ address-list-timeout=1w3d comment=”Drop_SSH_brute_forces1” disabled=no
/ip firewall filter add chain=input protocol=tcp dst-port=22 connection-state=new src-address-list=ssh_stage2 action=add-src-to-address-list address-list=ssh_stage3 address-list-timeout=1m comment=”Drop_SSH_brute_forces2” disabled=no
/ip firewall filter add chain=input protocol=tcp dst-port=22 connection-state=new src-address-list=ssh_stage1 action=add-src-to-address-list address-list=ssh_stage3 address-list-timeout=1m comment=”Drop_SSH_brute_forces3” disabled=no
/ip firewall filter add chain=input protocol=tcp dst-port=22 connection-state=new action=add-src-to-address-list address-list=ssh_stage1 address-list-timeout=1m comment=” Drop_SSH_brute_forces4”
–Untuk Filter Port Scanning
/ip firewall filter add chain=input protocol=tcp psd=21,3s,3,1 action=add-src-to-address-list address-list=”port scanners” address-list-timeout=2w comment=”Port_Scanners_To_List” disabled=no
/ip firewall filter add chain=input protocol=tcp tcp-flags=fin,!syn,!rst,!psh,!ack,!urg action=add-src-to-address-list address-list=”port scanners” address-list-timeout=2w comment=” Port_Scanners_To_List1” disabled=no
–Untuk Filter Port FTP
/ip firewall filter add chain=input protocol=tcp dst-port=21 src-address-list=ftp_blacklist action=drop comment=”Filter_FTP_to_Box” disabled=no
/ip firewall filter add chain=output protocol=tcp content=”530 Login incorrect” dst-limit=1/1m,9,dst-address/1m action=accept comment=”Filter_port_FTP1” disabled=no
/ip firewall filter add chain=output protocol=tcp content=”530 Login incorrect” action=add-dst-to-address-list address-list=ftp_blacklist address-list-timeout=3h comment=”Filter_port_FTP1” disabled=no
–Untuk Separate Packet Flag
/ip firewall filter add chain=forward protocol=tcp action=jump jump-target=tcp comment=”Separate_Protocol_into_Chains1” disabled=no
/ip firewall filter add chain=forward protocol=udp action=jump jump-target=udp comment=”Separate_Protocol_into_Chains2” disabled=no
/ip firewall filter add chain=forward protocol=icmp action=jump jump-target=icmp comment=”Separate_Protocol_into_Chains3” disabled=no
/ip firewall filter add chain=udp protocol=udp dst-port=69 action=drop comment=”Blocking_UDP_Packet1” disabled=no
/ip firewall filter add chain=udp protocol=udp dst-port=111 action=drop comment=”Blocking_UDP_Packet2” disabled=no
/ip firewall filter add chain=udp protocol=udp dst-port=135 action=drop comment=”Blocking_UDP_Packet3” disabled=no
/ip firewall filter add chain=udp protocol=udp dst-port=137-139 action=drop comment=”Blocking_UDP_Packet4” disabled=no
/ip firewall filter add chain=udp protocol=udp dst-port=2049 action=drop comment=”Blocking_UDP_Packet5” disabled=no
/ip firewall filter add chain=udp protocol=udp dst-port=3133 action=drop comment=”Blocking_UDP_Packet6” disabled=no
/ip firewall filter add chain=tcp protocol=tcp dst-port=69 action=drop comment=”Bloking_TCP_Packet” disabled=no
/ip firewall filter add chain=tcp protocol=tcp dst-port=111 action=drop comment=”Bloking_TCP_Packet1” disabled=no
/ip firewall filter add chain=tcp protocol=tcp dst-port=119 action=drop comment=”Bloking_TCP_Packet2” disabled=no
/ip firewall filter add chain=tcp protocol=tcp dst-port=135 action=drop comment=”Bloking_TCP_Packet3” disabled=no
/ip firewall filter add chain=tcp protocol=tcp dst-port=137-139 action=drop comment=”Bloking_TCP_Packet4” disabled=no
/ip firewall filter add chain=tcp protocol=tcp dst-port=445 action=drop comment=”Bloking_TCP_Packet5” disabled=no
/ip firewall filter add chain=tcp protocol=tcp dst-port=2049 action=drop comment=”Bloking_TCP_Packet6” disabled=no
/ip firewall filter add chain=tcp protocol=tcp dst-port=12345-12346 action=drop comment=”Bloking_TCP_Packet7” disabled=no
/ip firewall filter add chain=tcp protocol=tcp dst-port=20034 action=drop comment=”Bloking_TCP_Packet8” disabled=no
/ip firewall filter add chain=tcp protocol=tcp dst-port=3133 action=drop comment=”Bloking_TCP_Packet9” disabled=no
/ip firewall filter add chain=tcp protocol=tcp dst-port=67-68 action=drop comment=”Bloking_TCP_Packet10” disabled=no
–Untuk Blocking Bukis Mail Traffic
/ip firewall filter add chain=forward protocol=tcp dst-port=25 action=drop comment=”Allow_SMTP” disabled=no
–Untuk Filter DOS
/ip firewall filter add chain=icmp protocol=icmp icmp-options=0:0-255 limit=5,5 action=accept comment=”Limited_Ping_Flood” disabled=no
/ip firewall filter add chain=icmp protocol=icmp icmp-options=3:3 limit=5,5 action=accept comment=”Limited_Ping_Flood1” disabled=no
/ip firewall filter add chain=icmp protocol=icmp icmp-options=3:4 limit=5,5 action=accept comment=”Limited_Ping_Flood2” disabled=no
/ip firewall filter add chain=icmp protocol=icmp icmp-options=8:0-255 limit=5,5 action=accept comment=”Limited_Ping_Flood3” disabled=no
/ip firewall filter add chain=icmp protocol=icmp icmp-options=11:0-255 limit=5,5 action=accept comment=”Limited_Ping_Flood4” disabled=no
/ip firewall filter add chain=icmp protocol=icmp action=drop comment=”Limited_Ping_Flood5” disabled=no
–Untuk Connection P2P
/ip firewall filter add chain=forward p2p=all-p2p action=accept comment=”trafik_P2P” disabled=no
–Untuk Filter Junk Dan Koneksi yang Benar
/ip firewall filter add chain=input connection-state=established action=accept comment=”Connection_State1” disabled=no
/ip firewall filter add chain=input connection-state=related action=accept comment=”Connection_State2” disabled=no
/ip firewall filter add chain=input connection-state=invalid action=drop comment=”Connection_State3” disabled=no
–untuk Allow estabilished Connections
/ip firewall filter add chain=forward connection-state=established action=accept comment=”Allow_Established_Connections”
–Untuk Related Connections
/ip firewall filter add chain=forward connection-state=related action=accept comment=”Allow_Realted_connections”
–Untuk Drop Invalid Connections
/ip firewall filter add chain=forward connection-state=invalid action=drop comment=”Drop_Invalid_Connections”
–Untuk Drop Virus
/ip firewall filter add chain=forward connection-state=invalid action=drop comment=”drop_invalid_connections”
/ip firewall filter add chain=virus protocol=tcp dst-port=135-139 action=drop comment=”Drop_Blaster_Worm”
/ip firewall filter add chain=virus protocol=tcp dst-port=1433-1434 action=drop comment=”Worm”
/ip firewall filter add chain=virus protocol=tcp dst-port=445 action=drop comment=”Drop_Blaster_Worm”
/ ip firewall filter add chain=virus protocol=udp dst-port=445 action=drop comment=”Drop_Blaster_Worm”
/ip firewall filter add chain=virus protocol=tcp dst-port=593 action=drop comment=”________”
/ip firewall filter add chain=virus protocol=tcp dst-port=1024-1030 action=drop comment=”__________”
/ip firewall filter add chain=virus protocol=tcp dst-port=1080 action=drop comment=”
Drop¬_MyDoom”
/ip firewall filter add chain=virus protocol=tcp dst-port=1214 action=drop comment=”______”
/ip firewall filter add chain=virus protocol=tcp dst-port=1363 action=drop comment=”ndm requester”
/ip firewall filter add chain=virus protocol=tcp dst-port=1364 action=drop comment=”ndm server”
/ip firewall filter add chain=virus protocol=tcp dst-port=1368 action=drop comment=”screen cast”
/ip firewall filter add chain=virus protocol=tcp dst-port=1373 action=drop comment=”hromgrafx”
/ip firewall filter add chain=virus protocol=tcp dst-port=1377 action=drop comment=”cichlid”
/ip firewall filter add chain=virus protocol=tcp dst-port=2745 action=drop comment=”BagleVirus”
/ip firewall filter add chain=virus protocol=tcp dst-port=2283 action=drop comment=”DropDumaruY”
/ip firewall filter add chain=virus protocol=tcp dst-port=2535 action=drop comment=”DropBeagle”
/ip firewall filter add chain=virus protocol=tcp dst-port=2745 action=drop comment=”DropBeagle_C-K”
/ip firewall filter add chain=virus protocol=tcp dst-port=3127 action=drop comment=”DropMyDoom”
/ip firewall filter add chain=virus protocol=tcp dst-port=3410 action=drop comment=”DropBackdoorOptixPro”
/ip firewall filter add chain=virus protocol=tcp dst-port=4444 action=drop comment=”Worm1”
/ip firewall filter add chain=virus protocol=udp dst-port=4444 action=drop comment=”Worm2”
/ip firewall filter add chain=virus protocol=tcp dst-port=5554 action=drop comment=”DropSasser”
/ip firewall filter add chain=virus protocol=tcp dst-port=8866 action=drop comment=”DropBeagleB”
/ip firewall filter add chain=virus protocol=tcp dst-port=9898 action=drop comment=”DropDabber-A-B”
/ip firewall filter add chain=virus protocol=tcp dst-port=10080 action=drop comment=”DropMyDoom-B”
/ip firewall filter add chain=virus protocol=tcp dst-port=12345 action=drop comment=”DropNetBus”
/ip firewall filter add chain=virus protocol=tcp dst-port=17300 action=drop comment=”DropKuang2”
/ip firewall filter add chain=virus protocol=tcp dst-port=27374 action=drop comment=”DropSubSeven”
/ip firewall filter add chain=virus protocol=tcp dst-port=65506 action=drop comment=”DropPhatBot,Agobot,Gaobot”
/ip firewall filter add chain=forward action=jump jump-target=virus comment=”jump to the virus chain”
–Untuk Accept Estabilished Connections
/ip firewall filter add chain=input connection-state=established action=accept comment=”Accept_established_connections”
–Untuk Accept Related Connections
/ip firewall filter add chain=input connection-state=related action=accept comment=”Accept_related_connections”
–Untuk Drop Invalid Connections
/ip firewall filter add chain=input connection-state=invalid action=drop comment=”Drop_invalid_connections”
–Untuk UDP
/ip firewall filter add chain=input protocol=udp action=accept comment=”UDP”
–Untuk Allow Limited Ping
/ip firewall filter add chain=input protocol=icmp limit=50/5s,2 action=accept comment=”Allow_limited_pings”
–Untuk Drop Excess Ping
/ip firewall filter add chain=input protocol=icmp action=drop comment=”Drop_excess_pings”
–Untuk FTP
/ip firewall filter add chain=input protocol=tcp dst-port=21 src-address-list=ournetwork action=accept comment=”FTP”
–Untuk SSH for Secure shell
/ip firewall filter add chain=input protocol=tcp dst-port=22 src-address-list=ournetwork action=accept comment=”SSH_for_secure_shell”
–Untuk Telnet
/ip firewall filter add chain=input protocol=tcp dst-port=23 src-address-list=ournetwork action=accept comment=”Telnet”
–Untuk Web
/ip firewall filter add chain=input protocol=tcp dst-port=80 src-address-list=ournetwork action=accept comment=”Web”
–Untuk Winbox
/ip firewall filter add chain=input protocol=tcp dst-port=8291 src-address-list=ournetwork action=accept comment=”winbox”
–buat pptp-server
/ip firewall filter add chain=input protocol=tcp dst-port=1723 action=accept comment=”pptp-server”
–Buat log Everything else
/ip firewall filter add chain=input action=log log-prefix=”DROP INPUT” comment=”Log_everything_else”
–Buat Anti netcut
/ip firewall filter add action=accept chain=input comment=”Anti-Netcut1″ disabled=no dst-port=0-65535 protocol=tcp src-address=61.213.183.1-61.213.183.254
/ip firewall filter add action=accept chain=input comment=”Anti-Netcut2″ disabled=no dst-port=0-65535 protocol=tcp src-address=67.195.134.1-67.195.134.254
/ip firewall filter add action=accept chain=input comment=”Anti-Netcut3″ disabled=no dst-port=0-65535 protocol=tcp src-address=68.142.233.1-68.142.233.254
/ip firewall filter add action=accept chain=input comment=”Anti-Netcut4″ disabled=no dst-port=0-65535 protocol=tcp src-address=68.180.217.1-68.180.217.254
/ip firewall filter add action=accept chain=input comment=”Anti-Netcut5″ disabled=no dst-port=0-65535 protocol=tcp src-address=203.84.204.1-203.84.204.254
/ip firewall filter add action=accept chain=input comment=”Anti-Netcut6″ disabled=no dst-port=0-65535 protocol=tcp src-address=69.63.176.1-69.63.176.254
/ip firewall filter add action=accept chain=input comment=”Anti-Netcut7″ disabled=no dst-port=0-65535 protocol=tcp src-address=69.63.181.1-69.63.181.254
/ip firewall filter add action=accept chain=input comment=”Anti-Netcut8″ disabled=no dst-port=0-65535 protocol=tcp src-address=63.245.209.1-63.245.209.254
/ip firewall filter add action=accept chain=input comment=”Anti-Netcut9″ disabled=no dst-port=0-65535 protocol=tcp src-address=63.245.213.1-63.245.213.254
–Buat Mematikan Port yang digunakan SPAM
/ip firewall filter add chain=forward dst-port=135-139 protocol=tcp action=drop
/ip firewall filter add chain=forward dst-port=135-139 protocol=udp action=drop
/ip firewall filter add chain=forward dst-port=445 protocol=tcp action=drop
/ip firewall filter add chain=forward dst-port=445 protocol=udp action=drop
/ip firewall filter add chain=forward dst-port=593 protocol=tcp action=drop
/ip firewall filter add chain=forward dst-port=4444 protocol=tcp action=drop
/ip firewall filter add chain=forward dst-port=5554 protocol=tcp action=drop
/ip firewall filter add chain=forward dst-port=9996 protocol=tcp action=drop
/ip firewall filter add chain=forward dst-port=995-999 protocol=udp action=drop
/ip firewall filter add chain=forward dst-port=53 protocol=tcp action=drop
/ip firewall filter add chain=forward dst-port=55 protocol=tcp action=drop
Remote Winbox dengan IP Dinamis
Kebijakan telkom dalam memberikan layanan internet speedy akhir-akhir ini cukup menyulitkan pelanggannya yang menggunakan router Mikrotik. Seperti diketahui bahwa dengan menggunakan router Mikrotik, kondisi jaringan internet dapat diremote dari jarak jauh dengan menggunakan IP Public static yang diberikan speedy kepada para pelanggannya.
Namun seiring dengan kebijakan Telkom yang baru, dengan mengganti IP Public Static menjadi Dinamic sangat merepotkan user yang memiliki aktivitas tinggi dalam memantau jaringan internet dari jarak jauh.
Tulisan ini akan membahas bagaimana cara meremote Mikrotik dengan IP Dinamis yaitu dengan menggunakan freedns. Banyak tersedia layanan freedns dan dalam tulisan kali ini saya akan berbagi cara meremote mikrotik IP dinamis dengan freedns dari afraid.org.
Berikut langkah-langkahnya :
1. Dapatkan free domain di afraid.org dengan mendaftar terlebih dahulu di http://freedns.afraid.org/signup/
2. Gunakan email yang valid karena pendaftaran domain akan di verifikasi melalui email
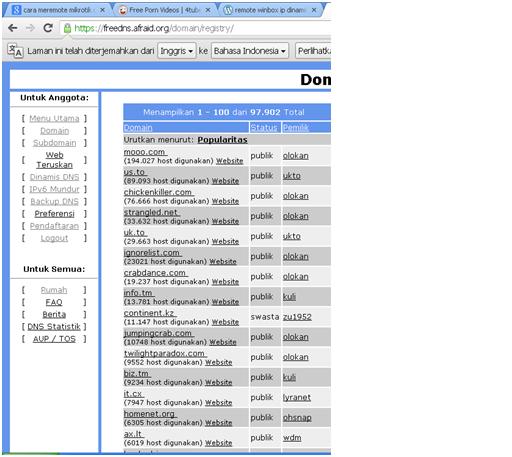
3. Selesai verifikasi email dan sukses, pilihlah sub-domain yang tersedia di http://freedns.afraid.org/domain/registry/
akan muncul barisan domain gratis dan pilih salah satu domain yang akan dijadikan sub-domain anda
4. Pilih salah satu domain, kemudian akan muncul tampilan untuk menentukan nama sub domain seperti contoh di bawah ini :

5. Tetukan Type-nya, nama subdomain dan untuk ip address destination abaikan saja dahulu lalu klik Save.
6. Sekarang beralih ke menu dynamic dns —> http://freedns.afraid.org/dynamic/
7. Nanti list dynamic sub-domain kita akan muncul disini dan berhubung kita memakai mikrotik kita hanya butuh urlnya saja
maka pilih Direct URL (copy saja urlnya – klik kanan simpan url) karena itu adalah konfigurasi milik anda.

misalnya url milik saya seperti ini:
https://freedns.afraid.org/dynamic/update.php?VVVFdmM2MzFVMVVBQU1BWmblablablabla…”
8. Sekarang pindah ke mikrotik, buka menu system–>script —> lalu masukan scriptnya pada kolom source, seperti ini :
# Update DNS on Freedns.afraid.org
:global host “freedns.afraid.org”
:global url “link domain free dns”
/tool fetch url=$url host=$host
Edit bagian global url sesuai dengan link yang kita dapatkan dari freedns seperti ini :
# Update DNS on Freedns.afraid.org
:global host “freedns.afraid.org”
:global url “https://freedns.afraid.org/dynamic/update.php?VVVFdmM2MzFVMVVBQU1BWmblablablabla…”
/tool fetch url=$url host=$host

9. Setelah klik Apply coba test dulu dengan mengklik Run Script kalau sukses nanti di panel freedns akan berubah IP Publik anda.

10. Langkah terakhir adalah membuat schedulenya

11. Untuk intervalnya sebaiknya 1 jam sekali saja biar tidak keseringan resolved dan terkena blacklist!


Komentar Terbaru